Nature therapy (part one): Nature-based art is about more than just art
Leaf printing. (Photo by Sage Yathon)
In a world full of change and unknowns, we can find ourselves looking for inspiration and positive outlets. There is one thing that is constant and can heal us: nature. Building and maintaining a relationship with nature can have many positive impacts on our well-being. I am so inspired by seeing people around me finding new hobbies and sharing their journeys of creativity, health and wellness, and positivity during COVID-19. Through a blog series, I would like to share some of these stories with you in hopes that it will help inspire you during these uncertain times.
First up is an interview with my dear friend Sage Yathon who re-ignited her passion for nature-based art by experimenting with natural fabric dyeing and leaf printing.
Download the PDF instructions for these projects:
Read on to learn about her journey as she is humbly reminded that the process itself holds real-life lessons!
Kayla Burak (KB): Tell us about yourself
Sage Yathon (SY): I am a mother of two living in Regina, Saskatchewan. I am an artist, a social worker and currently a stay-at-home mom. I love to get crafty and creativity is my outlet!
KB: What inspired you to start undertaking nature-based art projects?
SY: I dove down an Instagram rabbit hole full of textile artists and came out on the other side with a serious fire lit under me. I had not tapped into the artist side of my brain for years, and I could feel right away that this was what I needed.
KB: What is your favourite part about doing these projects?
SY: It feels good to do things the natural way, or original way. My favourite part of this process is seeing the materials go through several stages. For instance, with an avocado, I use the skins and pits to make fabric dye. I scoop out the insides, feed the avocado to my kids, chop up the skins and pits, boil them down into a dye, scoop them out of the pot, and toss them into my garden as compost. Once I am done using the dye, I pour that onto my garden as well. Everything comes full circle, and that feels good.
KB: Why is it important for you to incorporate nature into your life?
SY: Nature has taught me a lot about myself, and about control. I struggle with feeling the need to control all aspects of my life. Art and nature are two things that you can’t control, no matter how hard you try. My pieces never turn out the way that I plan, and I know that I shouldn’t blame myself for that. Certain vegetables make different coloured dyes than I expected, or they react to another ingredient in a way that I didn’t intend. I can choose to be frustrated, or I can choose to sit back and let nature teach me something.
KB: What would you say to someone who is thinking about taking up a hobby or project like this, but isn’t sure where to start?
SY: Start by prioritizing it. Hobbies will always be last on our to-do lists. We forget how much we need them, and the positive impact they can have on our mental health. Also, start by using the materials you can find in your home today. Being creative is using what you can find on hand.
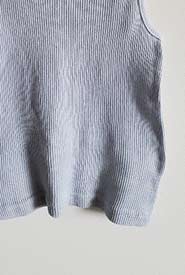
Activity #1: Natural fabric dyeing
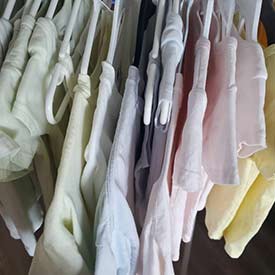
A rack of shirts dyed with natural colouring. (Photo by Sage Yathon)
What you will need:
- a large pot, a spoon, a stovetop
- 100% cotton fabric or clothing
- white vinegar
- avocados, yellow onions or black beans
Preparing your fabric or clothing
1. Start by gathering white clothing or fabric that you’d like to dye. It is important that the clothing or fabric is 100% cotton.
2. Machine or hand wash your materials with hot water and detergent.
3. No need to dry the fabric, as the next step is to “mordant” the fabric — prepare it to absorb colour. There are several ways to do this, but I used the vinegar method.
Vinegar mordant method
Add one-part white vinegar to three parts water in the largest pot you have and bring to a boil. Add fabric and fully submerge in the water. Let simmer with lid off for one hour. Remove and rinse under running water. Your fabric is now ready for the dye bath.
Making the dyes
I have had the most success using avocado skins and pits (make a peach/pink colour), yellow onion skins (make yellow/orange colour) and black beans (make a purple/blue colour). If you don’t have any of these, look for something in your kitchen or backyard that might produce colour. I have even used pine cones. Every time I make dyes, I get different results. Embrace the uncertainty!
Extracting dye from avocados
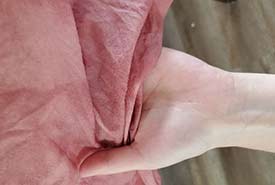
Fabric dyed with avocados. (Photo by Sage Yathon)
Take three avocados and scoop out the green flesh. Take the skins and the pits and put them in a large pot with just enough water to cover them. Bring to a boil and reduce the heat to a simmer. Let simmer with lid off for one hour. Turn off the heat and let it cool. Strain out all the pieces so that you only have your liquid dye left in the pot.
Extracting dye from yellow onions
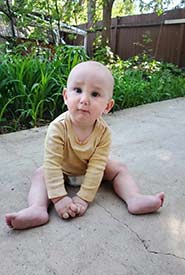
A toddler shirt dyed with yellow onion skins. (Photo by Sage Yathon)
Use three to five onions. Peel the onions, as you will only be using the skins. Add only the skins to a large pot, fill with enough water to cover. Bring to a boil, reduce heat to a simmer. Let simmer with lid off for one hour. Turn off the heat and let it cool. Strain out all of the pieces so that you only have liquid dye left in the pot.
Extracting dye from black beans
A shirt dyed with black beans. (Photo by Sage Yathon)
Make sure you are using dry black beans, not canned. Pour dry beans into a pot or large bowl and add enough cold water to cover the beans. Let sit overnight or for at least eight hours. Strain the beans out.
Dyeing clothing or fabric
Using your largest pot, add your dye and bring to a boil. Add your clothing or fabric, but wet it first if it is no longer wet from the previous step. Add a bit of water if needed to ensure the fabric is fully submerged. Reduce to a simmer with lid off for one hour, and let cool. Remove the fabric or clothing using gloves, rinse in cold water and hang to dry. Let the fabric or clothing fully dry, give it a day to set, and then machine wash on cold setting, and dry as you normally would.
Leaving clothing and fabrics in the dye bath for longer will give you deeper colours. I have learned that patience is all part of the process. Colours will be darker when wet and lighter when dry. Colours may fade a little after being washed. It takes some trial and error, so be kind to yourself and manage your expectations. This is meant to be fun, and there is no such thing as a failed art project.
Activity #2: Leaf printing
Disclaimer: Only gather plants from your yard and don’t pick ones that you are not familiar with. Be aware of plants that could pose a health hazard, such as poison ivy or giant hogweed.
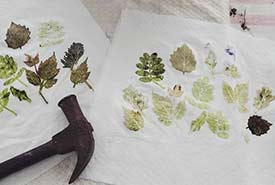
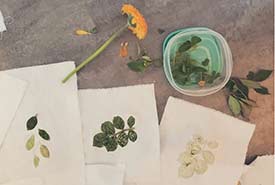
Leaf printing. (Photo by Sage Yathon)
What you will need
- 100% cotton fabric
- white vinegar
- leaves and/or flowers
- a hammer
- a wooden cutting board or hard surface
- an iron
Preparing your fabric
Similar to preparing fabric for dyeing, your fabric will need to be prepared for printing. For my prints, I use 100% cotton fabric. I found an old sheet that had been previously used as a painting drop cloth. I prepared it using the vinegar mordant method, and the prints have lasted really well, even after being washed and dried.
Creating a print
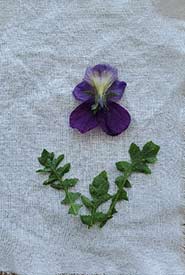
Flowers and leaf on a layer of fabric. (Photo by Sage Yathon)
After preparing your fabric using the mordant method, gather some leaves and flowers. Look for thin leaves and flat flowers, as these will leave the clearest print. Enjoy the gathering process, be gentle with the plants and only take what you need.
Lay down your first layer of fabric on the cutting board. Lay down an arrangement of leaves of flowers in any design you like on top of the fabric.
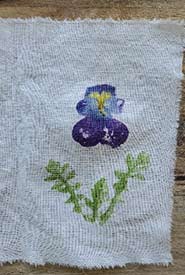
After hammering the flower and plant on the fabric. (Photo by Sage Yathon)
Lay down a second layer of fabric gently overtop. Holding the fabric down with one hand, gently hammer around the edges of each leaf or flower. Continue hammering until you see the entire leaf or flower showing through. Once you can see the entire print showing through, gently separate the two layers of fabric. Hang both pieces of fabric to dry. Don’t remove any bits of the leaf or flower that are stuck on the fabric, as they will peel off later once it has dried. The next day, you can peel or scratch off any leftover leaf bits or petals. To set your print, use an iron on cotton setting and press out your fabric. I lay a cloth on top first to protect the print.
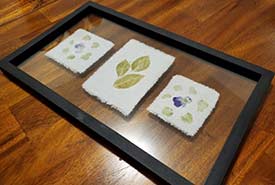
Framed prints. (Photo by Sage Yathon)
Display your print by simply by hanging it somewhere or putting it in a picture frame!

About the Author
Kayla Burak is the engagement manager for the Nature Conservancy of Canada's Saskatchewan region.
